Interested in Purchasing Property in the USA? What Do Foreign Buyers Need to Know About the Process?

You, coming from another country, are gearing up to buy a house in the USA but don't know where to start. Been browsing houses for half a year and are still unsure of what you really want? This article will walk you through the complete process of buying a house in the USA.
Step 1: What Documents Do You Need Before Buying a House?
Valid passport and visa
A proof of funds letter, or POF letter, proves you have the funds to buy a home. If funds are in a bank in your home country and your country's language is not English, you need a bilingual deposit certificate.
Bank account opened in a local bank in the USA
Additionally, for mortgage financing, you will need to provide proof of employment or income (you can request it from your company's HR department and have it translated by a notary public).

Step 2: Initial Meeting
At this stage, you need to select a suitable real estate agent, decide on the area you want to buy in, determine your budget, and specify the type of property you wish to purchase.
If you are financing your purchase with a mortgage, you also need to select a mortgage company at this time.
Step 3: Obtain a Loan Pre-Approval Letter
If you are purchasing with cash, you can skip this step.
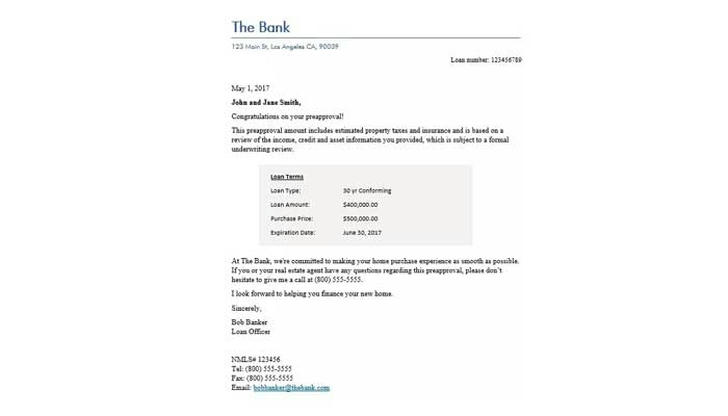
In this step, you need to obtain a pre-approval letter from a bank or mortgage lender. You can apply for a loan pre-approval letter from a bank or mortgage lender on your own, or you can ask a real estate agent to assist you.
Getting a loan pre-approval letter means the lender has reviewed your credit and financial situation, and you can also learn your budget limit and the maximum loan amount during this process.
Here are 2 tips:
You can contact multiple mortgage lenders for comparison, but it's best to complete the comparison within a short period to avoid affecting your credit score due to multiple credit inquiries.
The mortgage lender you ultimately apply with for the loan does not necessarily have to be the same as the one that issued the initial pre-approval letter. After obtaining the pre-approval letter, you can continue to search for a mortgage lender that suits you (e.g., with better interest rates, lower fees, etc.).
Step 4: Find Your Ideal Home
The most flexible and convenient way is to browse suitable properties on apps.
The most commonly used property apps in the USA are Redfin, Zillow, and Trulia, where you can find basic information about houses.
Another way is to ask your real estate agent to select the latest listings for you.
Some may ask, do I have to see the house in person? Generally, house viewings can be divided into two levels. The first is to take a casual look, where you can get a general idea of the house from pictures and information.
But after narrowing down your choices, it's best to visit the property in person. This allows you to experience the surrounding environment, whether the neighbors are friendly, and the quality of the house. The key is whether you feel comfortable in the house. If you feel uncomfortable as soon as you enter the house, you won't want to stay there even if you buy it.
Step 5: Making an Offer
In the USA, buying a house involves making an offer.
What does making an offer on a house mean?
It means that regardless of how you learned about the property, the price listed is the seller's asking price, not the final price. If you're interested in the property, you need to submit your offer price to the seller.
Whether your offer is above or below the seller's asking price depends on the area and the price set by the seller.
In areas like the San Francisco Bay Area where demand exceeds supply, final sale prices generally end up much higher than the seller's asking price (some even exceed it by over 50%). Additionally, some sellers may list their homes at a very low "bait" price to attract more buyers, which might make you think you're getting a steal, but it's often just a strategy.
Of course, if a property has been on the market for a long time (e.g., over two months) without selling, you may have the opportunity to lower the price.
You can seek advice from your real estate agent before deciding on the offer amount.

Step 6: Sending a Purchase Agreement to the Seller
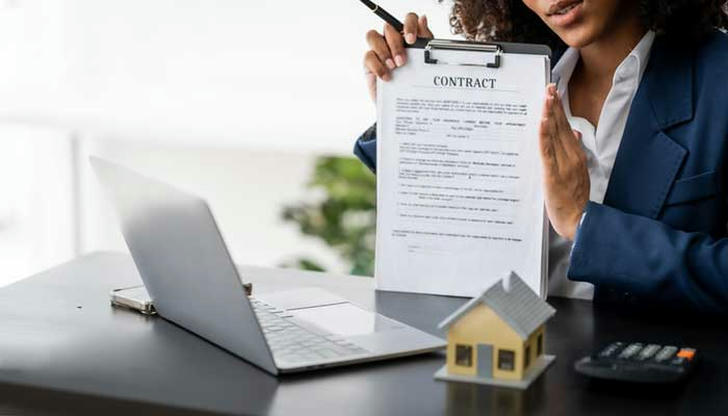
After deciding on the price, your real estate agent will help you prepare the purchase agreement.
In this step, it's crucial for your agent to explain all the terms of the agreement to you in detail and to answer any questions you may have.
Then your agent will send the contract on your behalf (you can't approach the seller directly), which includes details such as the offer amount, earnest money, whether financing is needed, inspection period, etc., along with an earnest money check (usually about 1-3% of the offer amount) and proof of funds.
For contracts involving financing, you also need to include loan information, such as the down payment percentage. Additionally, you need to attach the loan pre-approval letter.
For particularly competitive properties, you may also need to write a personal letter introducing yourself (your interests, your love for family, your adorable corgi, etc.). Sometimes, the winning bidder isn't necessarily the highest offer, but the seller's appreciation for you.
Upon receiving the purchase agreement, the seller may respond with a counteroffer for any terms they disagree with (it could be the price or other aspects). You can either counter back or accept it directly.
Step 7: Mutual Acceptance of the Purchase Agreement
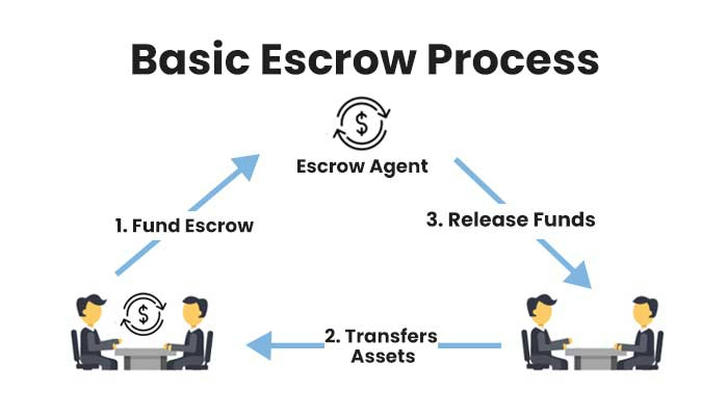
Once both parties agree on the purchase agreement, your earnest money will be transferred to the escrow company for safekeeping.

Step 8: Home Inspection
Typically, in the purchase agreement provided by the buyer, there's a clause called "home inspection" for earnest money refund protection.
This means that within a certain period (usually 5-10 days) after mutual acceptance of the purchase and sale, the buyer can inspect the home. If any issues are found during the inspection, the buyer can request a refund of the earnest money.
However, for some highly competitive properties, buyers may stylishly waive all their rights on the contract in order to win the property, regardless of the inspection results.
During this stage, your real estate agent will arrange for a professional inspector to assess the condition of the entire home. The inspection process usually takes several hours, and the report is typically available within 1-3 days.
If issues are found during the inspection, your agent will assist you in negotiating with the seller for repairs, price reduction, or termination of the transaction. Once the inspection results are satisfactory, the deal is finalized.
Step 9: Obtain a Loan, Home Appraisal, and Purchase Home Insurance
If you're purchasing with a loan, it's time to start submitting your loan application. The lending bank will conduct a home appraisal to ensure the property aligns with the market value and determine the loan amount.
If, for any reason, the loan cannot be obtained during this period, the agreement previously signed by both parties will determine whether the contract can be unconditionally canceled, and the full earnest money returned.
Usually, the contract will specify that if the loan cannot be obtained, the buyer can unconditionally cancel the contract and receive a full refund of the earnest money.
If the appraisal is satisfactory and the loan is approved, the lending bank will send all loan documents to the escrow company for the buyer's signature. After signing, the documents are returned to the lending bank for review. Once everything is confirmed, the loan will be funded.
After completing the loan application, you need to deposit the remaining down payment balance and various transaction fees into escrow before the closing date.
If purchasing with a loan, the lending bank will require the buyer to purchase home insurance before closing.

Step 10: Complete Escrow Procedures
After both the buyer and seller sign the contract, two companies will reach out to you: the escrow company and the title company, sometimes combined into one.
These companies are typically selected by the seller's agent before listing the property, and they act as independent third-party entities.
The escrow company handles document signings, transaction fees, taxes, property insurance, and the settlement of utility accounts.
The title company conducts a title search, issues a title report, and facilitates the transfer of ownership. You'll need to review the title report to ensure there are no issues.
Step 11: Reconfirm Property Condition
Since the closing process takes some time, assuming everything has gone smoothly in the preceding steps, it's advisable to revisit the property with your agent two days before closing or ideally within 24 hours. This ensures there have been no major changes or damages to the property since your last visit (e.g., unusual modifications by the seller like removing all the windows).

Step 12: Complete the Transfer of Ownership
On the closing day, the escrow company officially registers the notarized property transfer documents, known as the Warranty Deed, at the county government office.
Then, the buyer can receive the keys from the previous homeowner and become the new owner of the property. Within a period of time, typically 3-6 months after closing (depending on the government), the buyer will receive the official deed, known as the Original Recorded Deed.
Additionally, the buyer should proactively contact utility companies such as water, electricity, and gas, to arrange for continued service.
